Automating your home lighting is one of the most effective ways to add convenience, security, and energy efficiency to your living space. Whether you’re looking to control your lights remotely, set schedules, or integrate them with other smart home devices, the process is easier than you might think. In this guide, we’ll walk you through the steps to automate your home lighting and offer tips to make the process smooth and efficient.
Step 1: Choose the Right Smart Lighting System
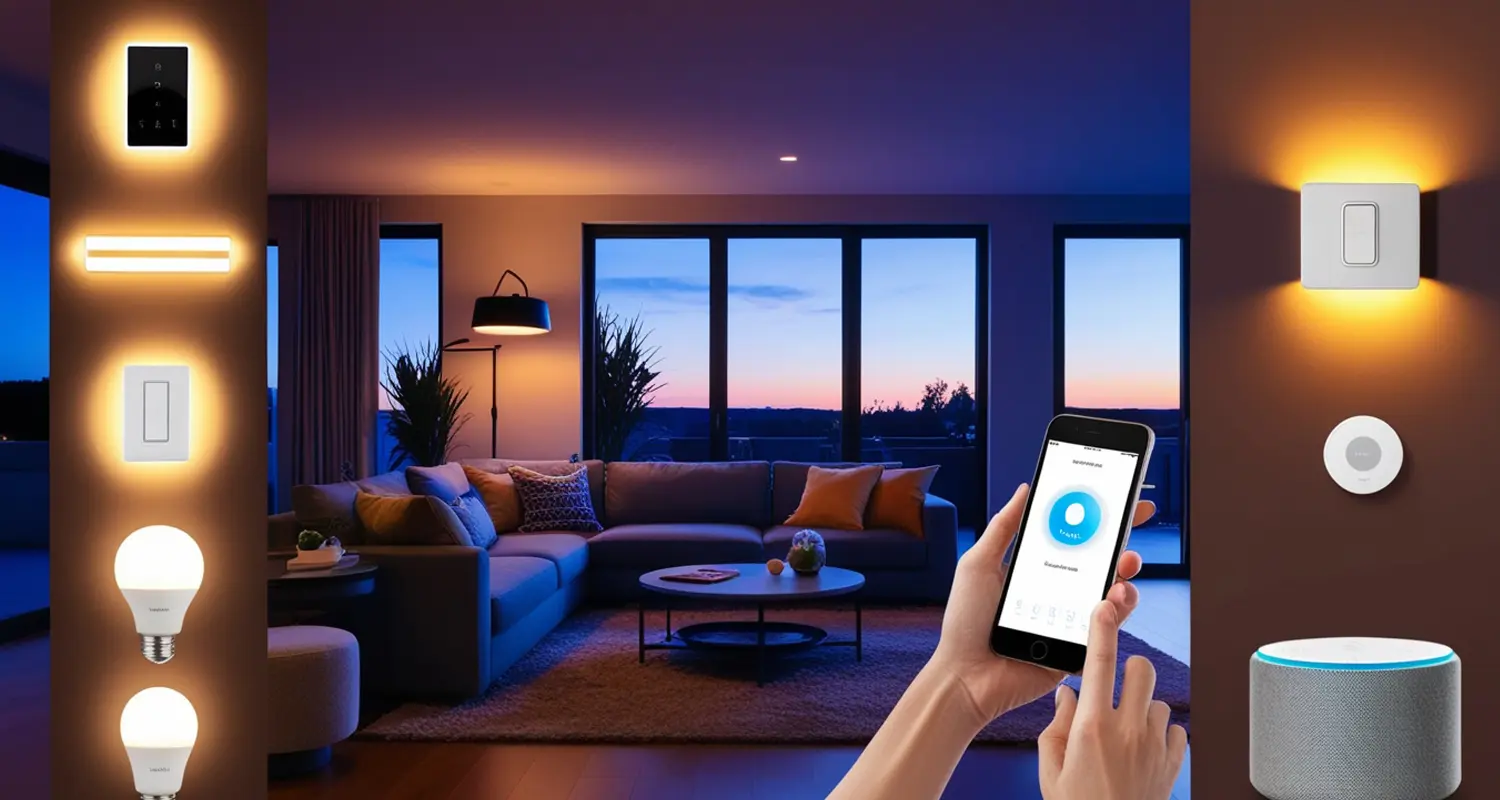
Before you begin, it’s important to choose a smart lighting system that fits your needs. There are several options available, from smart bulbs to smart switches and hubs. Here are a few popular choices:
- Smart Bulbs: Ideal for those looking to replace traditional bulbs. Brands like Philips Hue, LIFX, and Wyze offer options that are easy to install and come with features like color changes and dimming.
- Smart Switches: If you prefer to keep your existing bulbs, smart switches like those from Lutron or TP-Link can be installed to control your lighting from a central point.
- Smart Hubs: For more complex setups, a hub like Samsung SmartThings or Apple HomeKit can integrate various smart devices, including lights, into one system.
Tip: Consider compatibility with your existing smart home devices and voice assistants (like Alexa, Google Assistant, or Siri) when choosing your lighting system.
Step 2: Install the Smart Lighting Devices
Once you’ve chosen your smart lighting system, the next step is installation. Here’s how to do it:
- For Smart Bulbs:
- Replace Existing Bulbs: Simply screw in the smart bulbs in place of your traditional bulbs.
- Connect to Wi-Fi: Use the manufacturer’s app to connect the bulbs to your home Wi-Fi network.
- Test Functionality: Ensure the bulbs are responsive to app controls before moving on.
- For Smart Switches:
- Turn Off Power: Before installation, turn off the power at the circuit breaker to avoid electrical hazards.
- Install the Switch: Remove the existing switch, connect the smart switch according to the instructions, and secure it in place.
- Restore Power: Turn the power back on and test the switch using the app.
Tip: If you’re not comfortable working with electrical wiring, consider hiring a professional to install smart switches.
Step 3: Set Up Schedules and Automation
With your smart lighting installed, it’s time to set up schedules and automation to maximize efficiency:
- Daily Schedules: Use the app to create schedules that match your routine, such as turning on lights at sunset and off at bedtime.
- Automation with Sensors: Consider adding motion sensors that automatically turn on lights when someone enters a room and off when they leave.
- Integration with Other Devices: If you have a smart home hub, you can integrate lighting with other devices. For example, set up a scene where the lights dim when you start watching a movie.
Tip: Start with simple schedules and automations, then gradually add more complexity as you get comfortable with the system.
Step 4: Control Lighting Remotely
One of the key benefits of smart lighting is the ability to control it remotely. Here’s how:
- Use the App: Most smart lighting systems come with a dedicated app that allows you to control your lights from anywhere with an internet connection.
- Voice Control: If your system is compatible with voice assistants like Alexa or Google Assistant, you can use voice commands to control your lights.
- Geofencing: Some systems offer geofencing, which automatically turns lights on or off based on your location (e.g., turning on lights when you arrive home).
Tip: Enable push notifications to get alerts if your lights are left on when you’re not at home, helping you save energy.
Step 5: Optimize for Energy Efficiency
Smart lighting can significantly reduce your energy consumption. Here’s how to optimize for efficiency:
- Use LED Bulbs: Most smart bulbs are LED-based, which are more energy-efficient than traditional incandescent bulbs.
- Dimming Features: Use dimming features to reduce energy usage when full brightness isn’t necessary.
- Monitor Usage: Some apps provide energy usage statistics, helping you identify areas where you can save even more.
Tip: Combine smart lighting with other energy-efficient smart devices, such as smart thermostats, to further reduce your energy bills.
Conclusion
Automating your home lighting is a straightforward process that offers numerous benefits, from increased convenience to enhanced security and energy savings. By following these steps and tips, you can set up a smart lighting system that perfectly suits your lifestyle. Whether you’re new to smart home technology or looking to expand your existing setup, automated lighting is a great place to start.